Probing for Quality
Committed employee owners are the foundation of this company’s achievements in high precision manufacturing.
A shop’s path to success is commonly paved by the level of dedication and contribution of its employees. When each person’s voice is heard, problems are resolved more quickly, and when they see a direct reward for their efforts, the communication flows.
To foster an environment where both management and shopfloor personnel feel a direct impact from higher production rates and more efficient operation, Rable Machine Inc. (Mansfield, Ohio) is 100-percent employee owned, giving each employee a sense of authority in the decision making process. This formula has led to a willingness to embrace new technologies and implement a number of creative solutions to production issues.
Featured Content
Maximizing Machine Output
A move to a 53,000-square-foot-facility (a former bottling plant) on a 13-acre lot in 2010 has given Rable plenty of room to expand on its lean manufacturing and cellular machining strategies. The company provides precision machined components to industries such as oil and gas, pump and valve, medical, aerospace and automation. About 80 employees cover four shifts (including a weekend shift to prevent bottlenecks). The company’s equipment list is extensive, with almost 20 CNC turning centers, eight Swiss machines, 16 Brown & Sharpes and more than 20 machining centers. To keep these machines running efficiently, the shopfloor is segmented into process cells, with operators who specialize in particular operations in charge of several machines at a time. Only lightly tending the machines allows for higher production rates, but it also requires consistently reliable processes. To meet this need, Rable is always looking to improve its technology.
One area that the company clearly takes seriously is the quality of its products. Various measures are in place throughout the shop floor to drive quality into the process and ensure that parts are being produced consistently within the tight tolerance requirements.
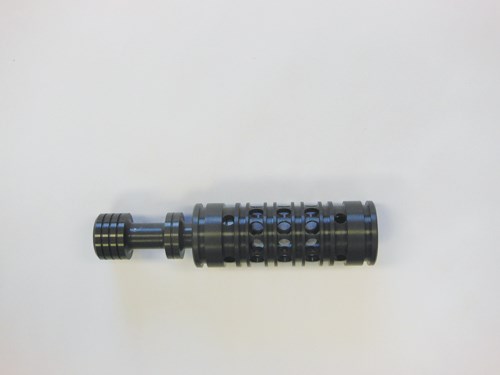
An example of this type of work is a family of valve spools and sleeves that the company produces on one of its CNC lathes. After machining, they are aluminum hard-coat anodized, ground and honed, then fit together using air gage measurement down to about 25 millionths clearance. Because of the tolerances, each pair becomes a match set, bagged individually for the customer.
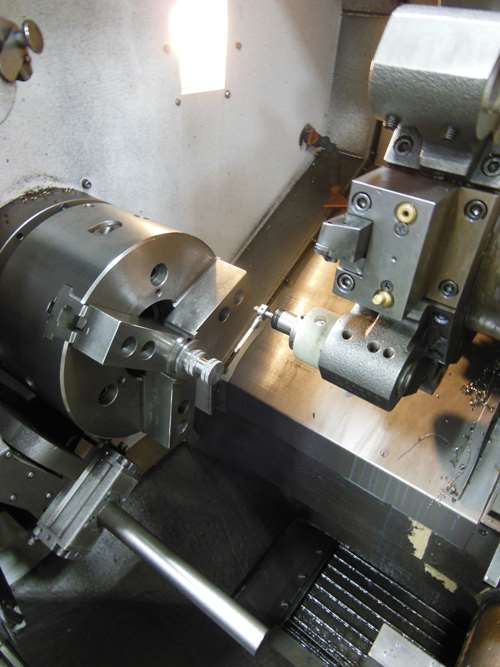
On-machine probing has also played a big role delivering the precision customers are demanding. Currently, five machines include touch probes to enable in-process inspection for close-tolerance part features. Measurement is performed for both OD and ID, routinely holding 0.0005" and, on certain parts, down to 0.0002". “We’ll often use the probe for our hard turning applications and to hold locations for highly critical work,” says Machinist Lester Beasley. “The probe automatically signals the machine control to make offsets based on the measurements taken. Alarms are set for out-of-tolerance.” Extra tool blocks allow the operator to interchange OD to ID and add more tooling when necessary.
From an applications standpoint, using the probe to measure, in effect, translates to lost cycle time by taking valuable machining time. During the advanced product quality planning (APQP) process, the engineering, programming and materials team establishes the basic process for common parts. For more complex, tight-tolerance parts, the group will schedule a Level 2 planning session, which adds the expertise of the cell leader, key setup personnel and quality technician to lay out a detail-specific outline of the process, identifying the key features or characteristics that need to be measured and how frequently the measurement will take place.
“We have to consider the process and how tight the tolerances are,” says Scott Carter, company president and CEO. “We’re only looking for a feature or two of a part that has a tight tolerance and a reasonable volume. Do we need to measure one out of every ten? Considering lost cycle time, can we get away with 1 in 20? The decisions are based on a variety of factors having to do with the process, the features, the tolerances, the machine, the tooling, the volume and what kind of sample size we need to make consistently good parts within an acceptable CPK range.”
Besides cycle time considerations, effective part probing requires close attention to chip evacuation. “It’s so frustrating when you have a probe tip taken off by a chip,” Mr. Carter says. “That’s expensive.” Rable only puts the probes on machines that have 1,000-psi coolant capability to be sure the chips are cleared. Unfortunately, even with high pressure coolant, some applications are not suitable for probing because they require too much metal removal, and there’s no way to manage the chip evacuation to the extent necessary. But overall, the probing operations have made a big difference in the final quality and consistency of a variety of the company’s products.
Controlling Quality
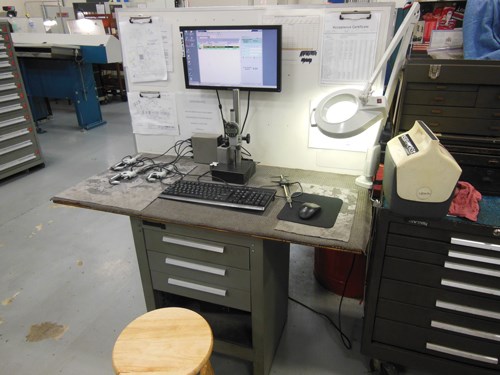
As part of the company’s ongoing efforts toward more efficient quality, it has implemented the Micronite knowledge-based SPC system from High Tech Research (Deerfield, Ill.). Ten workstations are set up throughout the shop floor, each hosting as many as four machines. The system allows operators to quickly enter dimensions without wading through multiple pages of a hard copy inspection control plan. It keeps track of the frequency of the checks, prompts operators when inspection is required and identifies the tool path that controls each dimension. When the size of a feature is still within tolerance, but starting to become volatile, the system will issue a warning and, if necessary, issue a stop alert to signal the operator to bring the process back under control.
“We make it as easy as possible for the machinist to put the data in,” Mr. Carter says. “We can identify a tool path as part of the inspection plan, and it shows the dimensions each tool controls. The software outlines a complete inspection plan—the dimensions, the tolerances, the inspection frequency. It has algorithms in it that, depending on the dimensions and how they’re holding, will automatically adjust the frequency of the checks. Guided by parameters that we preset, if a process is holding well, the system will require fewer checks, but if the process becomes more volatile, the checks become more frequent.”
The system can provide assurance to newer operators, helping them keep better track of the process. It also can help to prevent operator over-management. Rather than allowing a cutter to experience normal, expected wear, some operators try to stay in the middle of the tolerance band. Such over-management can result in not using all the available tool life as well as additional machine downtime for frequent adjustments.
“Like a lot of other shops, one operator doesn’t do just one job here,” Mr. Carter says. “They’re always running at least two machines, and sometimes as many as four. In order to keep a handle on the quality, we need to help our people succeed by giving them the tools that they need. This is one of the ways that we drive quality into the process.”
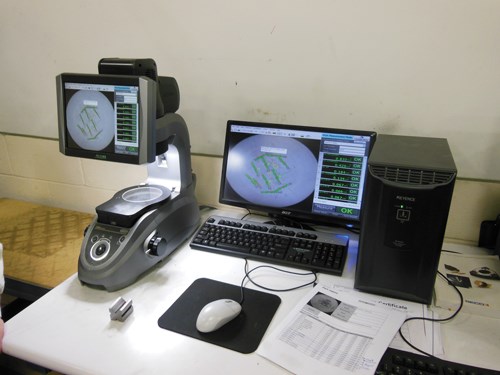
For further checking of parts, Rable has implemented an image dimension measurement system from Keyence Corp. After using the system for about a year and a half, the company has about 120 jobs programmed into it. To check a part, the operator simply places it in the staging area. The system automatically examines the part and, based on shape and dimensions, provides a visual list of the most logical matches from the library of programmed parts. Jeff Massoni, quality assurance manager, says, “Rarely is the correct part not first on the list, and part numbers are right there to verify it.”
Once the part is matched up with the program, the operator simply pushes a button, and within 3 seconds, the size and locations show up. A report can also be printed. The company is looking to integrate this system with the process management software, so a single report can be generated for the entire part.
Better Production
Rable has a nice mix of both new and old machines on the shop floor, but the company never stops looking for ways to improve production in all areas. The lineup of Brown & Sharpes naturally runs many of the larger volume jobs, but because industry is trending toward smaller lot sizes, the company has found a way to make this department better suited to meet these needs.
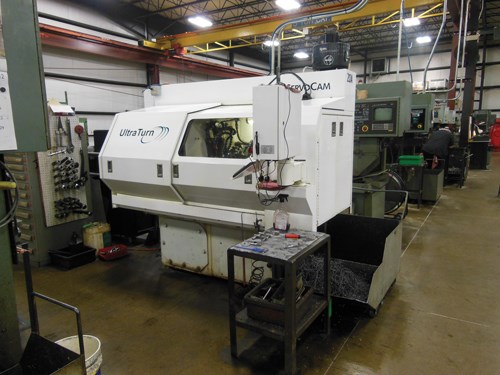
Several of the Brownies are now equipped with ServoCam UltraSlide upgrades and UltraTurn CL systems from AMT Machine Systems (Columbus, Ohio). The UltraSlide systems precisely synchronize the CNC turret-slide actuator to the existing camshaft. The UltraTurn CL systems add control of all slides and the spindle, through the transmission. As a result, most jobs run at least 20 to 40 percent faster than with custom cams.
The company also tested a beta version (and now has fully implemented) of AMT’s UltraTurn XL CNC-based single-spindle screw machine, which provides full CNC control of all the slides and the spindle. The system includes on-machine programming, a safety-latched enclosure, servo-controlled turret indexing, and eliminates the spindle clutches, chains and transmission.
According to Jim Feustel, cell leader in the Brown & Sharpe department, one of the biggest benefits of the UltraTurn is setup time. “You have no cams to take off and put on,” he explains. “You have no gearing to change on the machine. You can set your tooling off the machine and have your tools preset so you just go in and go. It’s a lot more like a CNC than it is a Brown & Sharpe, and it’s more precise, as well. The repeatability is at least as good as cams, if not better.” Overall, Mr. Feustel says the UltraTurn has improved production by about 40 percent over the Brown & Sharpes.
Employee Owned
When a company has the support of a dedicated group of employees, it’s likely to continue to grow. Rable strives to be on the leading edge of manufacturing technology, and Mr. Carter attributes the company’s accomplishments to the value the employees feel they supply.
“Our emphasis is with our people. That’s our foundation,” he says. The company is set up as an ESOP—an Employee Stock Ownership Plan. Each employee is a stock shareholder in the company with a direct financial stake in its performance. So as management invests in equipment for better efficiency, shopfloor personnel fully accept this equipment rather than seeing it as a threat.
“Being an employee-owned company is a very cool thing,” Mr. Carter says. “Everyone has stock in the business, so their perspective is really very strong in terms of customer value and continuous improvement. We get them involved in the purchase of the equipment, deciding what will be most beneficial to the business. We put together teams, depending on what area we need to grow. And they help us with reviewing the technology and putting us in the right direction.”
Business has been very good at Rable. Although the recession took a toll, record growth in 2008 and 2011, as well as another record year projected for 2012, indicate that the formula works. Rable took advantage of the recession and boldly positioned the company to continue its growth by purchasing a 53,000-square-foot building and moving the company in 2010. In fact, since 2007,
the company has won five consecutive Leading EDGE awards from Northeast Ohio’s Economic Development through Growth and Entrepreneurship organization, reflecting the region’s highest rolling 3-year average revenue growth and return to shareholder. It was also recently recognized for strength during the recession by the Ohio Employee Ownership Conference and State Representative Jay Goyal.
RELATED CONTENT
-
Dry Swiss Machining in Medical
Continuing to build its reputation for creative solutions, this multi-faceted medical device component manufacturer took its Swiss machining operations to a new level to meet a customer’s market demands.
-
A New Approach to CNC Turning
This turning process takes advantage of a turn-mill’s B-axis spindle to vary a tool’s approach angle to optimize chip control and feed rates.
-
Hard Turning as an Alternative to Grinding
Hard turning can be a cost effective alternative for shops looking to streamline part processing.


