Choosing the Right Toolsetting and Detection Technologies
Investing the time to invest in the right machines can mean the difference between a profitable operation and an ongoing headache.
#micromachining
At the highest level, toolsetting and detection choices break down into only a couple of categories: contact/non-contact and wired/wireless. Within each of those categories is a range of technologies that offer optimum solutions for specific application niches: normal/ultra precision, laser/camera, rotating/stationary tool, normal size/micro tool, vertical/horizontal machining center, CNC lathe with or without live tools/Swiss automatic, and radio frequency (RF)/Bluetooth wireless.
Moreover, while each technology may be an optimum selection for a niche application, there is also a lot of overlap outside that niche to complicate the choice. On top of that, there is a cost differential between the simplest and most complex technology and the existence of hybrids that combine more than one.
Featured Content
Wired vs. Wireless
Perhaps the best place to start sorting out the options is with the simple wired/wireless choice, which is straightforward. Wired systems generally are less expensive than comparable wireless units because the communication components don’t need to be built into the hardware. The actual on-machine hardware may be physically smaller for the same reason. Additionally, there are no batteries to be charged or changed.
The downside of wired systems is the wires. Machine tools and wires simply don’t get along well, and the resulting maintenance downtime and wire replacement cost can be significant.
Wired systems have their place, and where they fit, they work well. But there is a need to consider the machining environment carefully to avoid long-term maintenance headaches. A simple contact toolsetter on a VMC table is probably going to be a good application. The same toolsetter on a HMC with a rotary table probably isn’t.
Finally, remember that wired systems are not any more accurate than wireless systems. A typical touch probe will deliver 1 micron accuracy, and a laser will deliver 0.2 micron in either a wired or wireless configuration.
On the wireless side, the only real issues are range and traditional RF versus Bluetooth communication. Unless the shop is running a large machine such as an aerospace spar mill, range is not likely to be a consideration, and if it is, the issue is easily addressed.
Bluetooth, and particularly the latest incarnations of Low Energy Bluetooth, are emerging as the winners in the communication technology competition, so much so that the issue may not even exist outside legacy systems for much longer. That’s at least one technology choice that doesn’t present much of a challenge.
However, once the wired/wireless decision is made, things start to get more complicated.
Contact vs. Non-Contact
Contact systems all use some variation of touch probe technology to determine tool location or detect broken or missing tools. The differences between available systems are in the kind of probe used and whether the probe is fixed or moving.
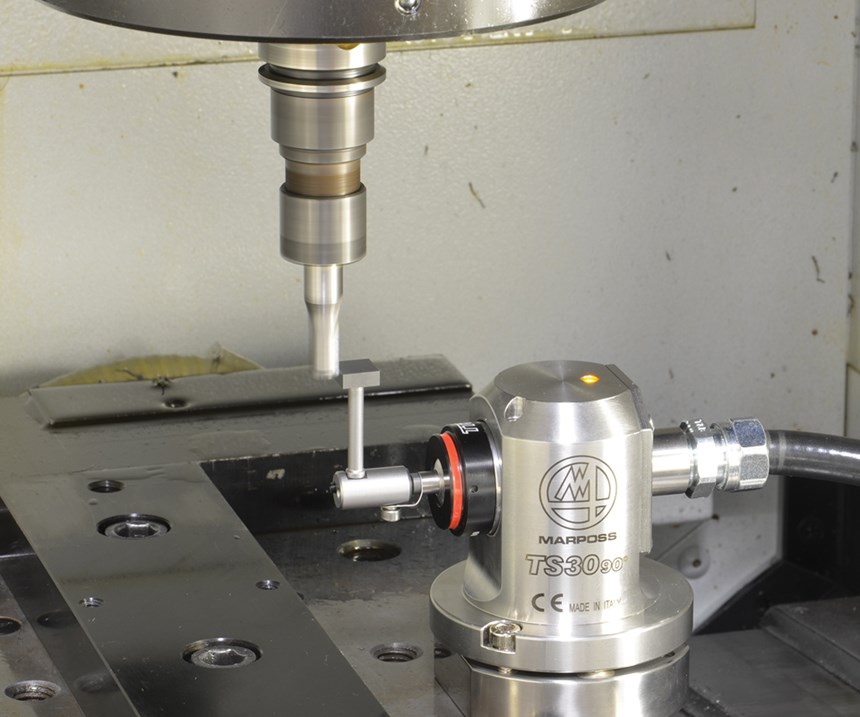
It is worth noting that the term “probe” does not necessarily mean a long, thin stylus device with a ball on the end. A simple toolsetter, for example, might consist of a measurement device with one or more contact “pads” that is permanently affixed to the table or some other component of a VMC. The only visible element may well be the arm or “cross” that connects the “pads” to the measurement mechanism inside the housing.
The tool is brought into contact with the probe to determine its presence, its size, its condition and its location. Within certain limits, a relatively smooth cylindrical tool such as a drill or end mill can be rotating when it contacts the probe, which will also allow runout to be measured. Rotational speeds faster than about 400 rpm are likely to damage the probe, in most cases, which limits the usefulness of this application.
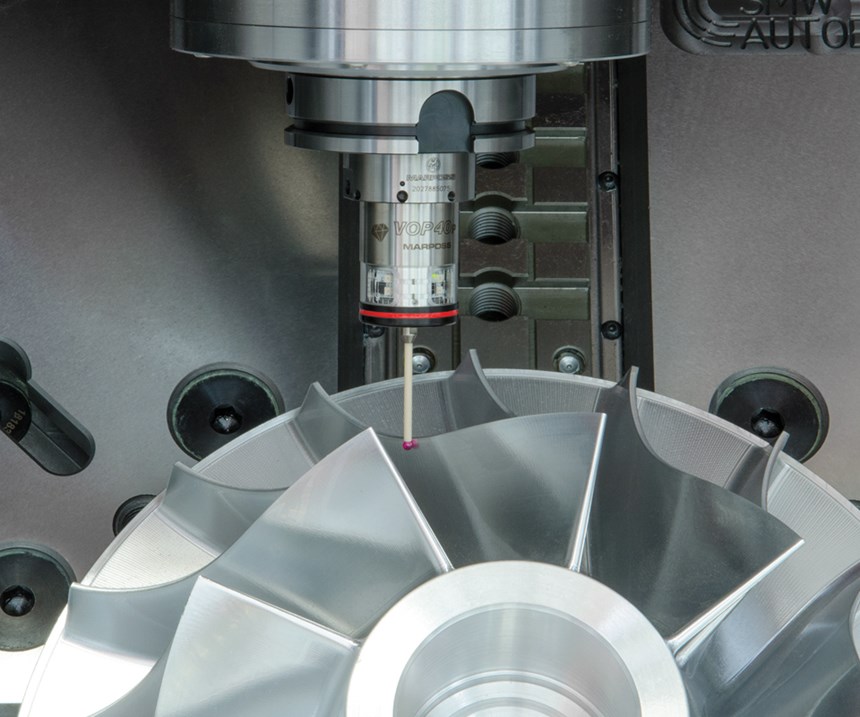
Probes also can be used to measure tool wear indirectly by inspecting the area of the workpiece being machined by the tool. This requires a high precision probe and a mechanism to bring it into contact with the workpiece. This technique is particularly useful on turret lathes, where the probe can be installed in the turret so the measurement becomes part of the programmed machining cycle. It’s an excellent application for a wireless system.
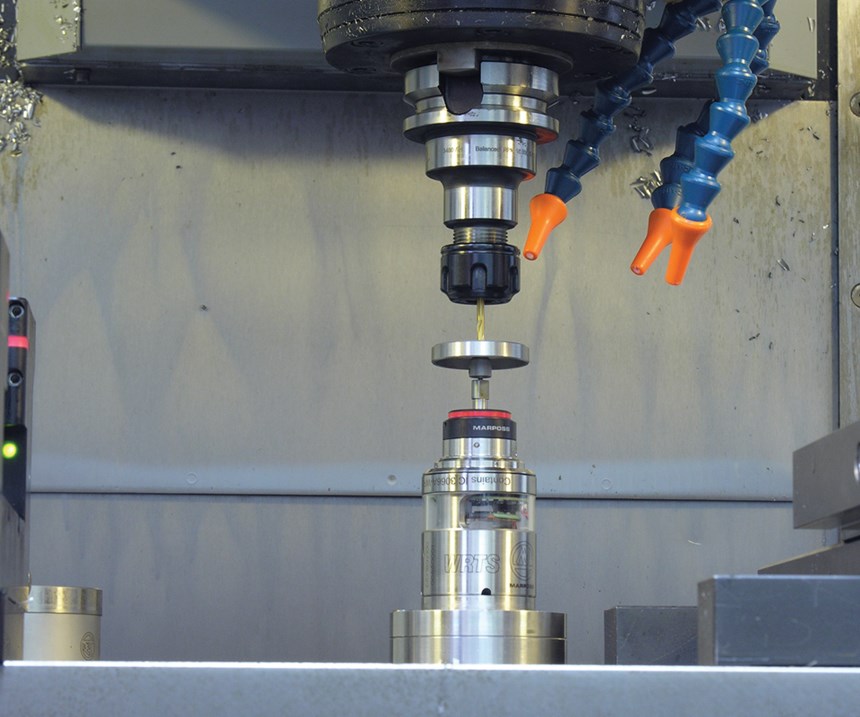
HMCs present a more complex mounting challenge because they often use rotating tables and/or pallet loading. One way to handle the situation is to place a wireless touch-type toolsetter on each pallet that communicates with a common receiver located on the machine. This arrangement can be used for toolsetting, tool measurement and tool breakage detection with a relatively simple and inexpensive wireless touch probe.
An alternative solution is to mount the touch probe on an automated “pop-up” bracket that moves into position to measure the tool or workpiece and then retracts during the machining operation. Depending on the specific machining environment, this might be a good application for either a wired or wireless system.
Lathes present a different set of challenges for toolsetting and breakage detection because they can use both live and non-rotating tools. An operator to place a contact probe on an electric arm that moves it into contact with the non-rotating tools on a turret. These arms are available from Marposs pre-engineered to fit the specific lathe brand and model.
Since contact technology is of limited value for rotating tools, however, pairing a contact probe with non-contact technology is often optimal for lathes. One such system uses a laser to verify the rotating tools and a touch probe to scan the non-rotating tools. It’s neither pure contact nor pure non-contact, but rather a hybrid system configured to meet a specific set of requirements on a particular type of machine tool.
Such a hybrid system is also useful when thermal compensation is required on a high-precision machine tool. A laser can only measure in two dimensions since one axis must be fixed. The touch probe can be used to generate the third axis data, however, to complete the measurement.
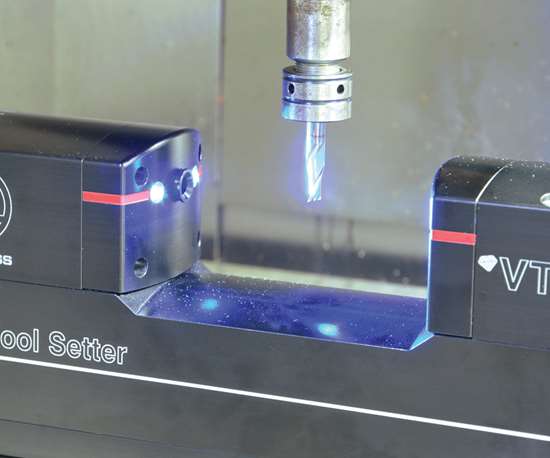
The laser used in those systems is one of two major non-contact technologies available today. The other is based on a camera application. The difference is essentially that the laser detector measures a shadow and the camera detector measures a positive image. The difference is significant.
Laser systems are sensitive to beam size and require that about 50 percent of the beam is blocked by the tool to work effectively. If the beam is larger than the tool, significant inaccuracies are introduced into the measurement. This makes the use of laser system problematical for small tools.
Because the camera system measures an actual image, it is less limited by tool size. This makes it the technology of choice for micromachining applications where tools can be as small as 0.002 inch or 0.003 inch in diameter. Because the camera system counts actual known-size pixels in the image, it can achieve the slightly better resolution than the 0.2 micron possible with a laser. The Marposs VTS visual toolsetter has the capability of measuring static tools, including lathe tools, in a matter of seconds.
Camera systems do have limitations, though. The VTS visual toolsetter, for example, has a maximum diameter capability of 45 mm and a minimum diameter of 10 microns. It also has a 500-micron window for measuring a complete tool, and beyond that, can only image an edge.
Where the camera is justified, however, its cost certainly is not prohibitive. On a machine such as the Makino IQ-300 micromachining center, a Marposs VTS system would represent less than 3 percent of the total capital investment. Considering the value of the parts produced on that system, the cost of the machine tool and tooling, and the fact that there is no other technology available for that application, represents a bargain.
For those who don’t compete in that esoteric marketplace, however, the laser represents a solid choice for non-contact applications. It’s more economical, costing typically 25 percent of the price of a camera system. It’s able to detect and measure tools rotating at any speed, which reduces cycle time. Also, it’s extremely flexible.
On a machine such as a Swiss automatic, for example, where access to tooling is limited and space for mounting a toolsetter or breakage detector is virtually non-existent, a laser still can be used with a bit of innovation. One customer built a special bracket that places the laser in the machine’s spindle where it can measure all of the tools. Obviously, this system interrupts production, but it has proven to be cost-effective for this particular application.
Another customer mounted a laser to measure only a few critical tools in the turret using a custom bracket. Here again, it’s not a comprehensive solution, but it has proven to be cost-effective for this application.
Mounting a laser on a VMC is generally not difficult. Most applications require simply attaching the laser, or even a touch setter, to a raised block that’s affixed to the table.
Mounting a laser on a HMC is a bit more difficult because the laser needs to move with the table that often rotates and/or is loaded with pallets. One component of the laser system, either the transmitter or receiver, needs to be below the table top to provide clearance while the other needs to be high enough above the table to clear the top of the workpiece. Typical solutions include a motorized “pop-up” or a “goal post” bracket with one side longer than the other. These are almost always wireless solutions.
Other Non-Contact Technologies
There are three other approaches to tool detection and tool breakage prevention that are worth mentioning. One is the use of acoustic emission sensors to detect breakage in small tools. The second is a similar application of vibration sensors. The third is the use of coolant flow monitoring to prevent breakage. All three are niche technologies that are valuable within their niches.
If an acoustic sensor is located in the right place, it can detect the typical 10 to 400 Hz sound that a tool makes as it breaks. This is particularly useful in applications using small tools in the 1-mm to 2-mm range on multiple tool heads with as many as 20 tools working simultaneously.
The tools all need to be within almost 20 percent of the same diameter, otherwise multiple sensors will be required. The sensors themselves may be mounted on the machine or on the fixture, depending on the specific application parameters.
Vibration sensing is the best solution for a compact machine with many moving parts such as a Swiss automatic. Here, the machine noise masks the sound of the tool breaking, but a one-, two-or three-axis vibration sensor can still detect the signature of a breaking tool. This application often requires the use of multiple sensors, one on each slide.
Finally, for small diameter, deep-hole gundrilling operations, monitoring coolant flow can detect incipient tool breakage in time to prevent it. Since the most common cause of tool breakage in these operations is incomplete chip removal, monitoring the coolant flow signature will provide an accurate indication of impending tool failure.
Choosing the optimal toolsetting, monitoring and breakage detection technology from the range of options available is a daunting challenge. However, with a better understanding of the relative advantages and benefits of the available choices, it is a challenge you can approach with confidence in the outcome.
RELATED CONTENT
-
Micro Deburring Gets Hot
“Micro deburring,” a name commonly used to describe the deburring of tiny small parts, is often considered more of an art than a science. Although this is true to some extent, deburring micro parts does not always have to require hand manicuring parts with a scalpel under 10× to 20× magnification.
-
Understanding Micro-Milling Machine Technology
Micro-milling can be a companion process to turning-based production machining. This article looks at some of the technologies that go into a micro-milling machine and why they are important to successful operation.
-
Manufacturing Efficiently at a Micron Level
Grinding very small-diameter instruments for use in medical procedures is a niche business for this micro-grinding machine manufacturer. The company makes machines that use a variety of grinding techniques to manufacture guidewires for the medical industry.


